|
<< Click to Display Table of Contents >> View Menu |
  
|
|
<< Click to Display Table of Contents >> View Menu |
|

Variables and Instruments
Toolbar: ![]()
Toggles the Variables List On and Off
New Instruments
Toolbar ![]()
Toggles the Templates List On and Off
Toggle Grid Lines:
Shortcut: Ctrl + G
The Toggle Grid Lines menu item (Ctrl-G) on the View menu, cycles round the 3 grid-size settings.
The fourth setting is zero to disable the grid. This allows objects on the screen to be positioned manually to within one pixel, this requires very precise positioning of the mouse or by using the cursor keys on the keyboard to nudge objects by one pixel, or when holding the Shift key down nudge by the size of one grid square.
The purpose of the Grid is to help with alignment of objects when positioning them with respect to each other, as objects will appear to jump by the Grid Size setting, which saves having to move the mouse quite so precisely.
The Grid lines themselves are drawn at intervals of ten times the actual Grid size for clarity.
Set Grid Sizes:
The Grid Size menu item on the View menu allows 3 grid settings to be specified. The defaults are: 5, 10 and 20 pixels.
The dashed grid-lines are drawn at 10 times the actual grid-size for clarity, so a grid of 5 will have dashed lines every 50 pixels, etc.
Note: When putting values in tables set the grid to a larger number than the default value of 5 before starting, this will make it easier to align them.
Enter the value for a new grid size. A larger number = a coarser grid.
The Grid lines themselves are drawn at intervals of ten times the Grid Size for clarity.
Therefore, if the Grid Size is set to 5 then the Grid lines will be drawn every 50 pixels.
It is possible to disable the grid, by setting the Grid Size to zero & unchecking Grid Lines.
Screen Color
Changes the color of the GDW background
NOTE: If the GDW is going to be printed, leave the background white to save ink.
Show Objects
This toggles the highlighting of objects which have been inserted using Insert New Object… from the Edit Menu.
These are used to display the outline of the portion of the screen that would be seen if the GDW were displayed onto a screen of that resolution.
This is particularly useful when creating a GDW for Remote access from a lower resolution screen to ensure that the items on a GDW are positioned appropriately.
The maximum dimensions of the grid shown in SpecView's Edit mode is: 3837 x 2117.
As of Version 3.1.251, Show Screen Size Guides menu has additional options added as seen in the image below.
Click on the options to enable them.
If checked, click on the options to disable them.
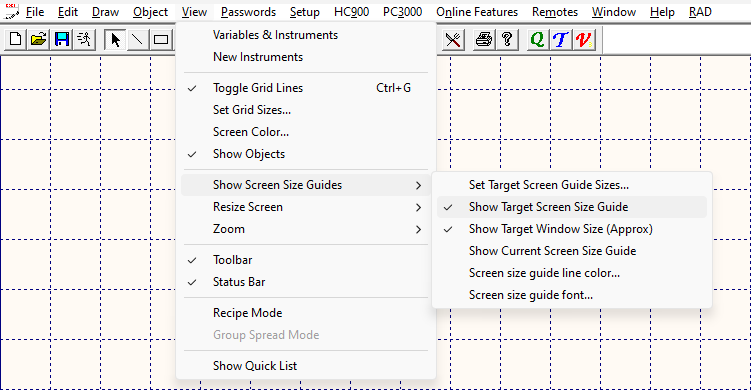
Enables users to set the dimensions for the target screen size resolution.

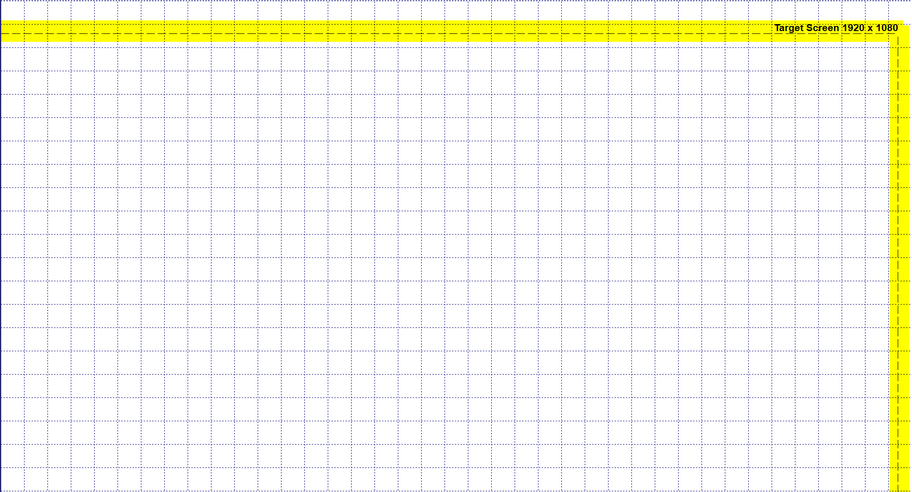
Displays the Target Screen Size Guide.
Show Target Window Size (Approx)
Displays the window size available for the Target Screen Size chosen.
A Target Window Size approximation is automatically calculated by SpecView when setting the target resolution using Set Target Screen Guide Sizes.
For example, if the target resolution is 1920 x 1080 (HD), then the Target Window Size is approximately 1903 x 972.
The Target Window Size accounts for the SpecView Scroll bars, SpecView Menu bar, Windows Task bar, and Windows Title bar.
When creating a GDW, it is best to have the dimensions of the GDW match the target window size to ensure that all the contents of the GDW are visible on the screen.
However, this target window size is an approximation, and further editing of the GDW and its contents might be required.

Show Current Screen Size Guide
Displays the Current Screen Size Guide with the resolution of the monitor that SpecView is currently opened on.
For example, if the monitor's current resolution is 2560 x 1440, then those dimensions will appear in the Current Screen Size Guide.
However, if the resolution changes or SpecView is dragged to another monitor with a different resolution, then SpecView will automatically change the dimensions appearing for the Current Screen Size Guide.

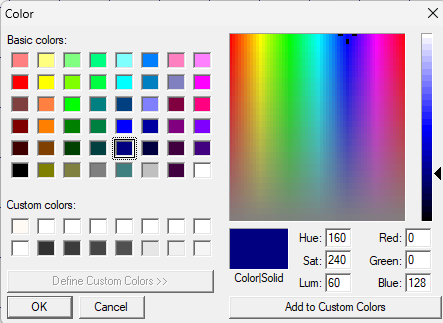
Enables the selection of the Screen Size Guide's line color.
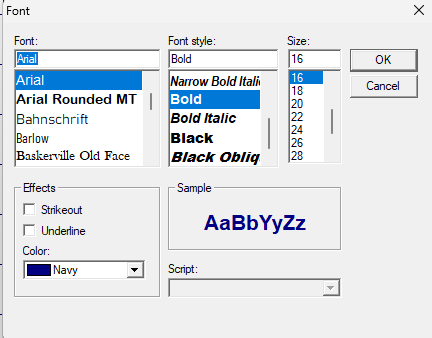
Enables the selection of the font for the Screen Size Guide.
Toolbar
Toggles the Toolbar On and Off
Status Bar
Toggles the Status Bar (at the bottom of the screen) On and Off
NOTE: Turning Off the Status Bar in Edit Mode will hide it in Runtime Mode
If the GDW was created on a computer with a different screen resolution it will be necessary to resize the GDW to fit the current resolution.
Resizes this GDW from the first resolution to the second.
The project must be in Edit Mode (Offline) to resize.
Additionally, please be aware that text resizing while changing the resolution of a GDW can be arduous.
Resize Screen works as good first step, but additional editing and fine tuning will be required to get the GDW and its contents to an appropriate size.
As of Version 3.1.251, additional Resize Screen options have been added.
The following options can be seen in the image below.

To apply other reduction or expansion sizes for screen resolutions not present in the menu follow the steps below.
| 1. | Ensure the project has been saved and backed up. |
| 2. | Enter Edit Mode (Offline) via File > Edit Mode (go offline) if in Runtime Mode or via Online Features (fully offline) in Edit Mode. |
If in Runtime Mode and the Menu Bar at the top is not visible, then the project is in Fullscreen Mode.
Please exit Fullscreen Mode by using the appropriate buttons on the screen or the Magic Square.
| 3. | Know your desired screen resolution for either reduction or expansion. |
For example, if the screen's current resolution is 640 x 480 and the desired screen resolution is 2048 x 1152, then an expansion is required.
However, if the current screen resolution is 2048 x 1152 and the desired screen resolution is 640 x 480, then a reduction is required.
| 4. | Click on View from the Menu bar. |
| 5. | Click on Resize Screen. |
| 6. | Click on Other reduction sizes... if a reduction is required, otherwise click on Other expansion sizes... if an expansion is required. |
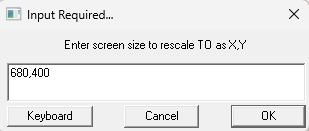
| 7. | In the Input Required Box, enter the width and length of the current resolution respectively or enter 0 for the option of entering a scaling factor. |
For example, if the current resolution is 2048 x 1152, then enter 2048,1152.

| 8. | Click OK in the Input Required Box. |
If current screen resolution was entered,
| 9. | Enter desired screen resolution. |
For example, if the desired screen resolution is 680 x 400, then enter 680,400.
| 10. | Click OK in the Input Required Box. |
If 0 was entered,
| 9. | Enter the scaling factors for width and length of the screen. |
For example, if the desired screen resolution needs to be 1.5 times the width and 1.5 times the length of the current screen resolution, then enter 1.5,1.5.

| 10. | Click OK in the Input Required Box. |
| 11. | For the warning that appears on the screen, click on Yes to apply screen resize for all GDWs in the project or click on No to resize only the current GDW. |
If Yes is clicked on, then SpecView will resize all the GDWs in the project.
So, if there are 50 GDWs in the project and only 10 are currently being used, then SpecView will still open all 50 GDWs and resize them.
This might lead to unintended consequences such as text and graphics being incorrectly resized or mispositioned.
To avoid unintended consequences, ensure Step 1 is followed and proceed with caution.
Out of the total 50 GDWs in the project, if only 10 GDWs are being utilized, then it might be prudent to click No and individually resize 10 screens.

Zoom
Zooms the current GDW. This is useful for detailed editing and precise positioning of objects.
Zoom 100%
Returns the GDW to normal size
Zoom 150%
Zoom 200%
Zoom 300%
Zoom 400%
Zoom 500%
Zooms the GDW to the specified percentage of normal size
Recipe Mode
Toggles the Recipe Mode On and Off
NOTE: You can also cancel the Recipe Mode by pressing ESC