|
<< Click to Display Table of Contents >> Position Dynamics |
  
|
|
<< Click to Display Table of Contents >> Position Dynamics |
|
Position Dynamics allows objects on the screen to be positioned according to the value of a variable, this is useful for animation of an object.
Such as: an object moving, or a button disappearing, etc.
For example: the progress of a product along a conveyor belt, as shown here:
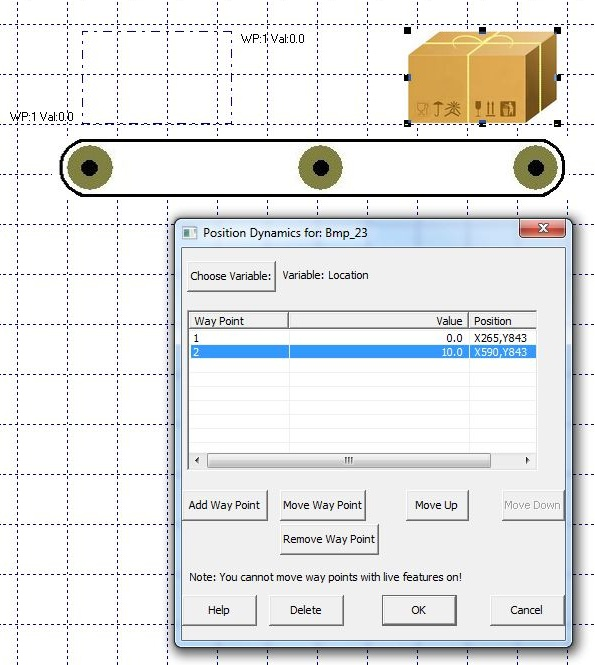
To setup Position Dynamics, for example: a carton on a conveyor belt, follow these steps:
| • | From Edit Mode put the object on the screen (in this example, a bitmap of a carton) and select it. |
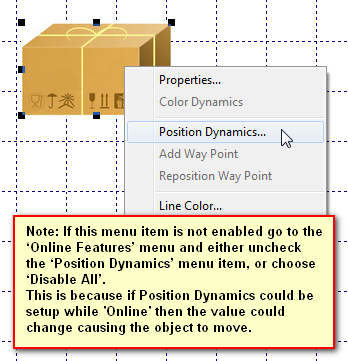
| • | Using the Online Features menu check that Position Dynamics is disabled, or choose Disable All. This is because if live values are being received then the value could change causing the object to move while setting up Position Dynamics . |
| • | Either choose Position Dynamics from the Edit menu or right-click and choose Position Dynamics from the popup menu. |
| • | Drag and drop the variable, from the Variables List, this will be used to determine the position of the object. |
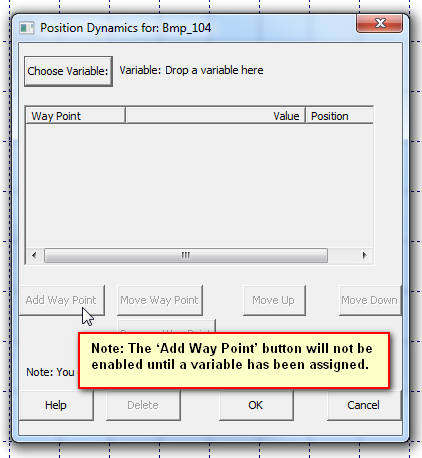
| • | If the object is not in the first position then move it there by dragging, and click the Add Way Point button and enter the value for the first position into the Value cell. This will mean that when the variable has this value the object will be positioned at this location. |
| • | Move the object to the next position required for the next waypoint and click Add Way Point and enter the Value in the cell for that position, etc. |
| • | When all way points have been entered it is possible to verify them by clicking on each Way Point in the list in turn and see the position of the highlight change. When finished, click OK. |

Note: Copying and Pasting of objects on a screen (GDW) will preserve their Position Dynamics settings.