|
<< Click to Display Table of Contents >> Print Setup |
  
|
|
<< Click to Display Table of Contents >> Print Setup |
|
Use this menu command to edit printer settings, such as:
- Selecting an orientation.
- Using a different printer.
- Creating a PDF (Portable Document Format) file.
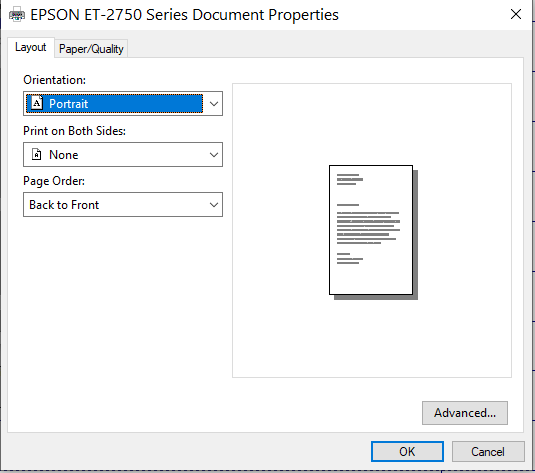
Selecting An Orientation
Click on Portrait or Landscape to print in Portrait or Landscape mode respectively.

Click on OK once an orientation has been chosen and clicked on to confirm the changes.
The changes can be viewed in Print Preview to view how the screen will be printed on the paper in the chosen orientation.
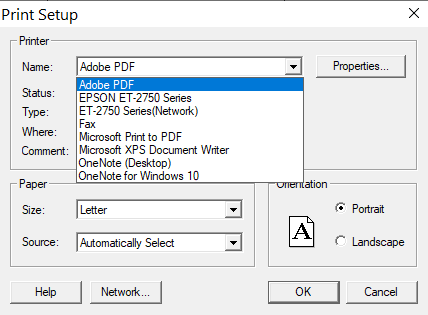
Using A Different Printer
From the Name drop down menu, select and click on the appropriate printer to print out the screen.

Once the appropriate printer has been selected, the size and type of paper being printed on can be selected from the Size and Source drop down menus respectively.
The properties of the printer can be edited further by clicking on Properties. Click OK to confirm the changes made to the printer properties.

For advanced printer properties, click on Advanced. Click OK to confirm the changes made to the printer properties.

Printer properties for each printer will be different. For example, some printers might not have the capability of color printing.
Creating A PDF
To create a PDF file instead of printing out the image, select and click on PDF from the Name drop down menu in Printer Setup.
Click OK to confirm the changes.
To create the PDF file, follow the printing instructions mentioned in Printing.
File Explorer will open to aid in selecting the destination where the PDF file should be saved and what the name of the PDF file should be.